

Her Majesty's DBS Resto Update: Body Trims
 Gebruder Gumbold
San FranciscoPosts: 545MI6 Agent
Gebruder Gumbold
San FranciscoPosts: 545MI6 Agent
Dear AJB Brethren,
She is coming along nicely, but I am beginning to feel the pressure of the clock, as November isn't all that far away from her debut at the SF Auto Show. It very well may be a push into Moscone Centre!
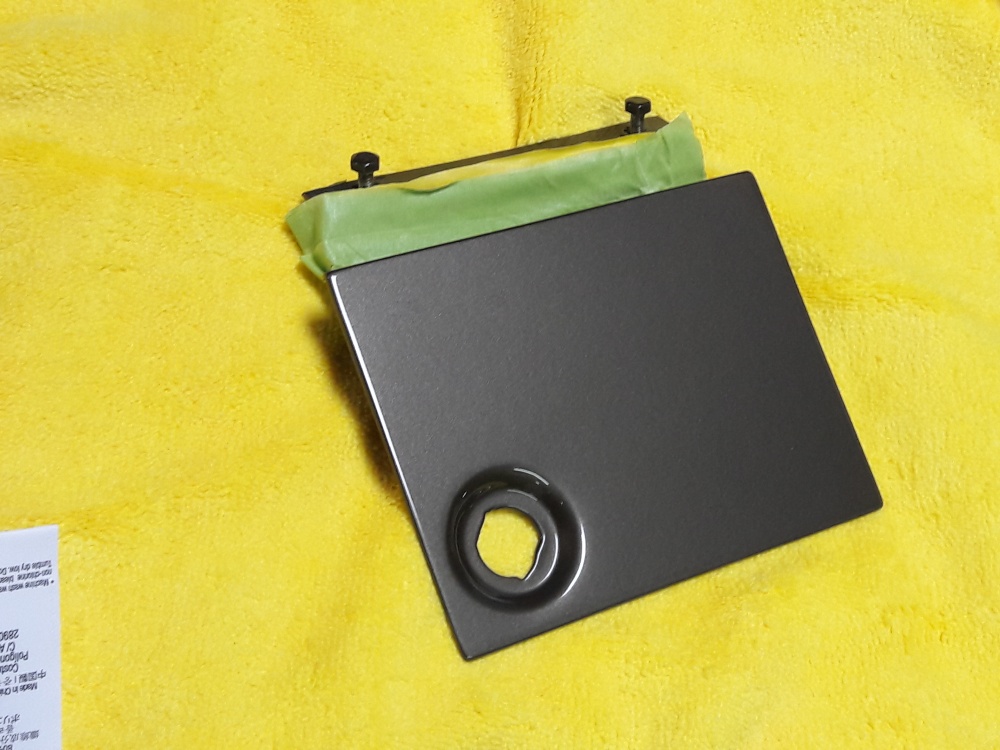
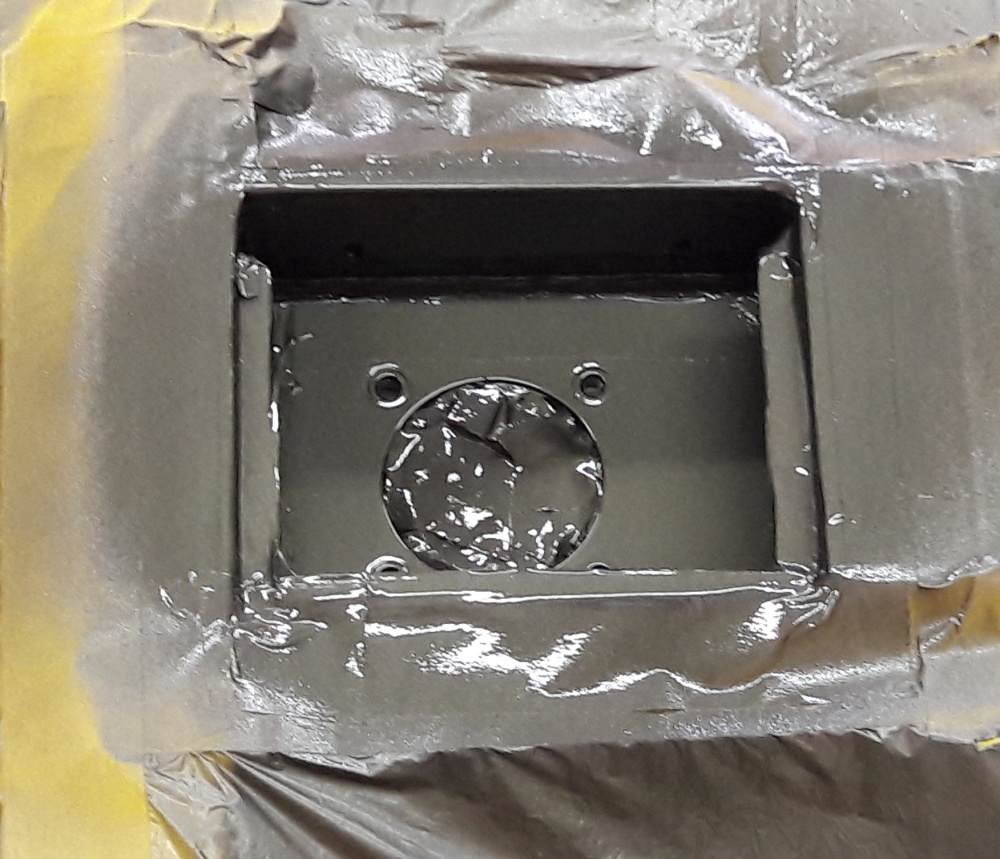
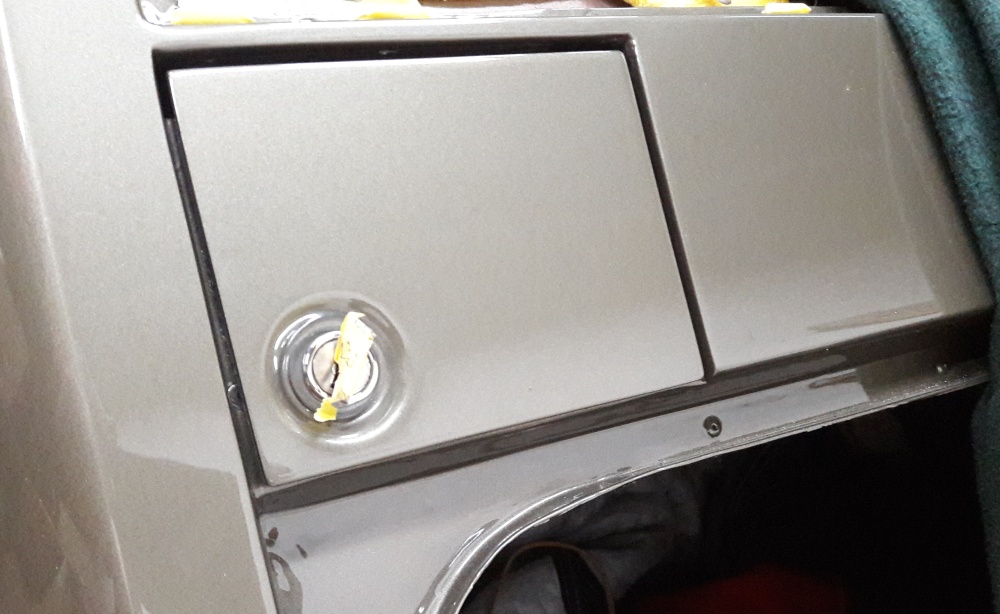
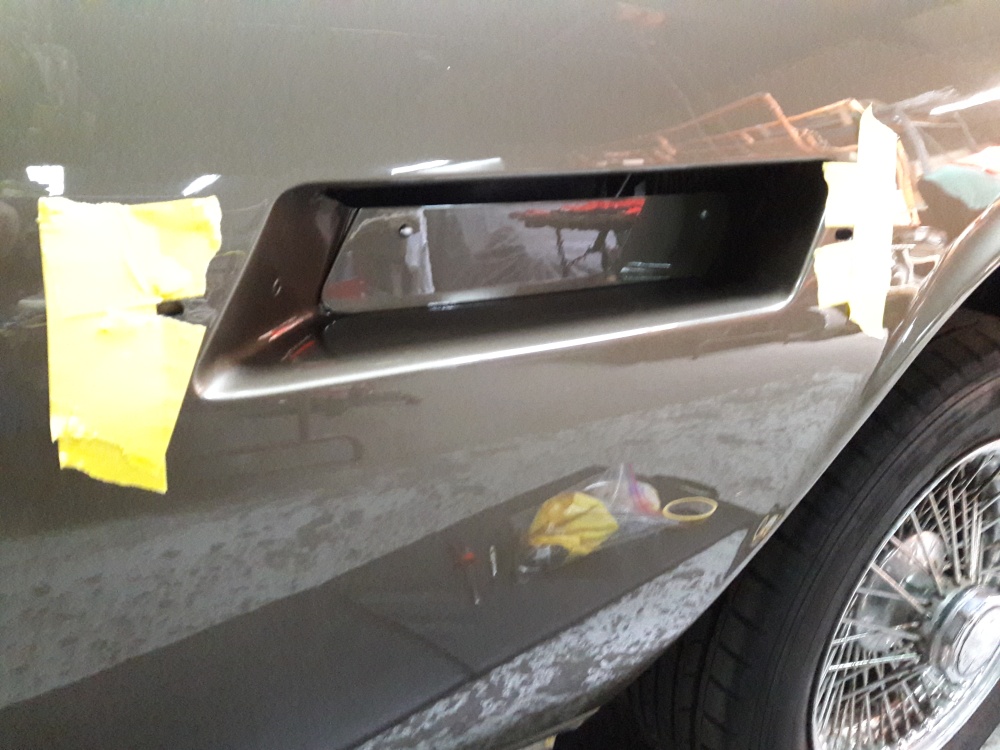
Had to go 2 steps backward to go one step forward. I just wasn't happy with the paint inside the fuel door pockets, so I disassembled the filler flaps and resprayed the pockets after serious prep. I resealed the seams with some 2 part epoxy seam sealer, which nicely shows brushstrokes- which are correct to have. A thicker sealer was used, as the regular 3M type for the collision industry hides brushstrokes, which is fine for modern cars. Very, very happy with the fit of the fuel doors, as they are stamped out steel, and never quite fit perfectly from the factory. I spent a great deal of time in the blocking phase to get them fitted correctly, and follow the arc of the valance panel and rear wings surrounding them.
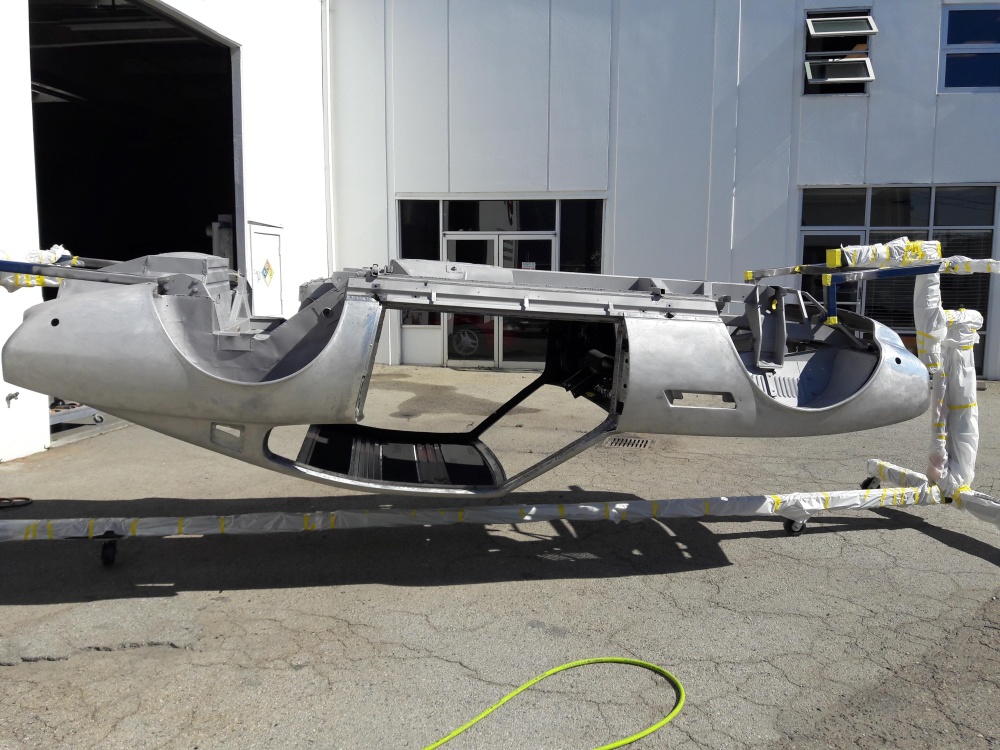
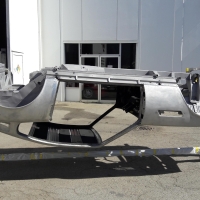
Reminder of her condition a couple of years ago. That rotisserie was a Godsend, and you really can't do a proper job without one. At my age now, crawling under cars just isn't possible...
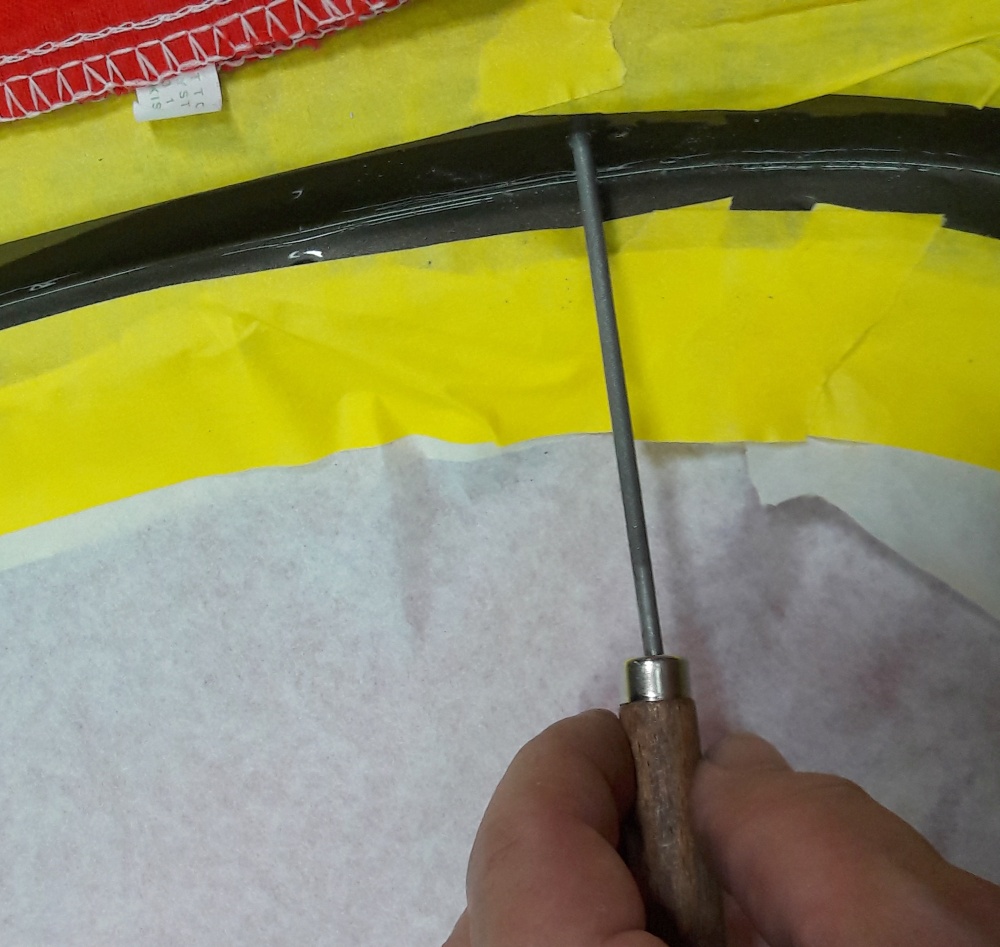
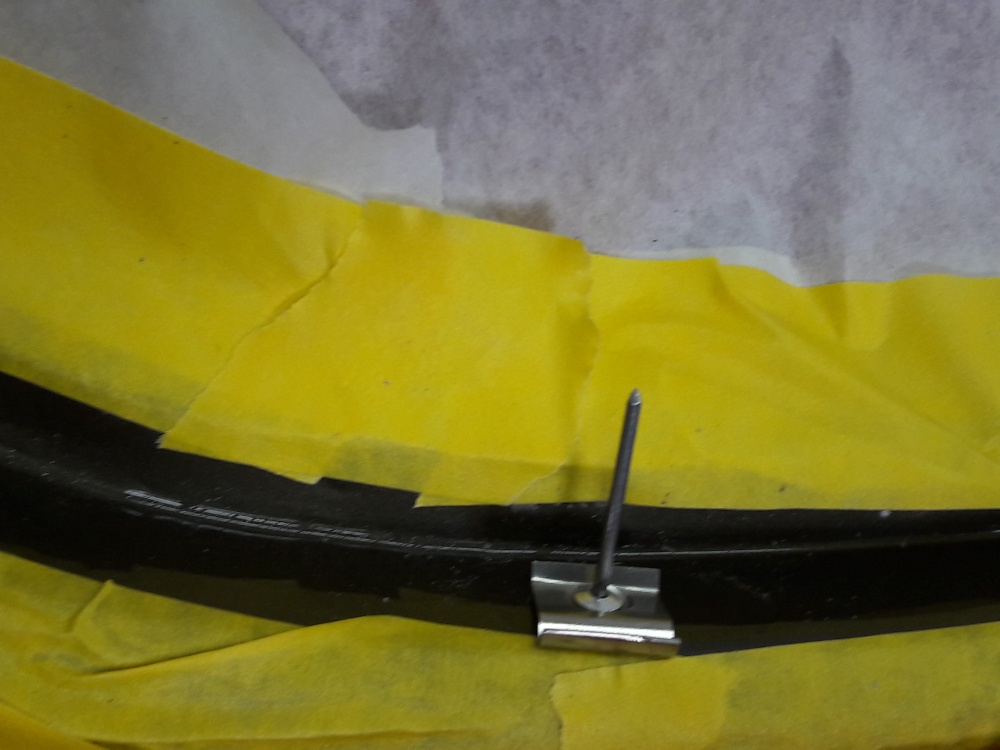
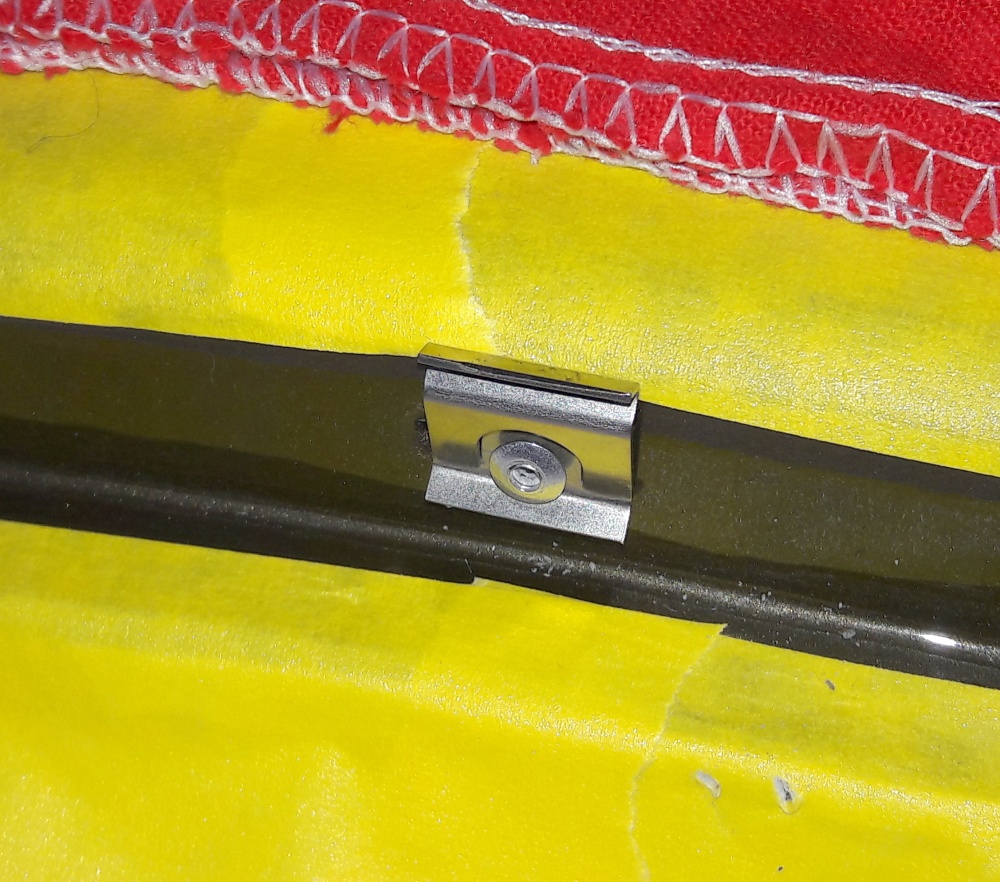
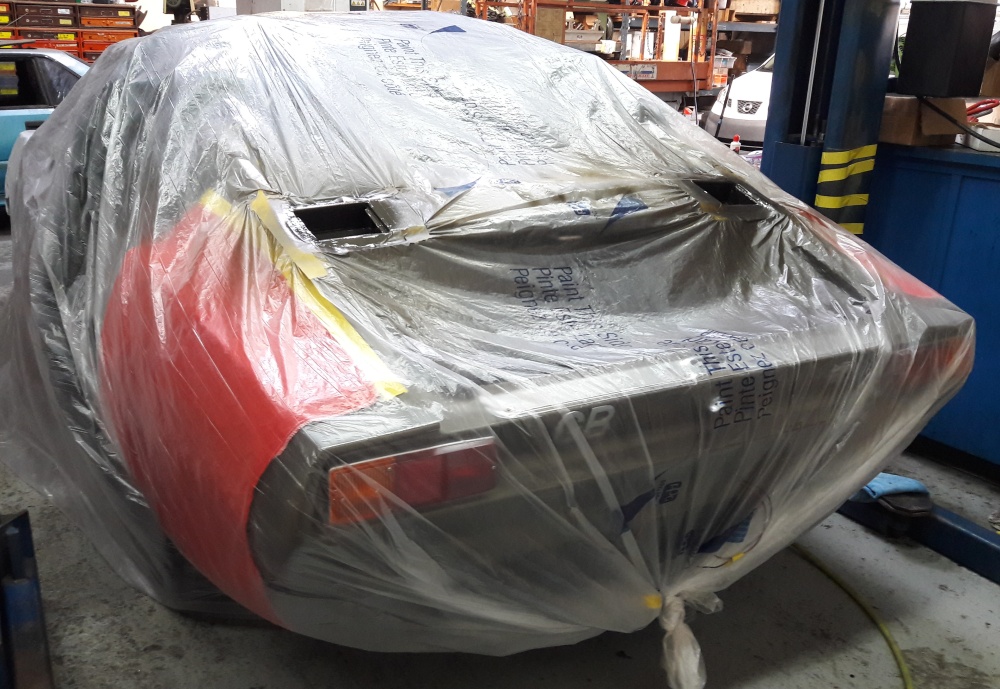
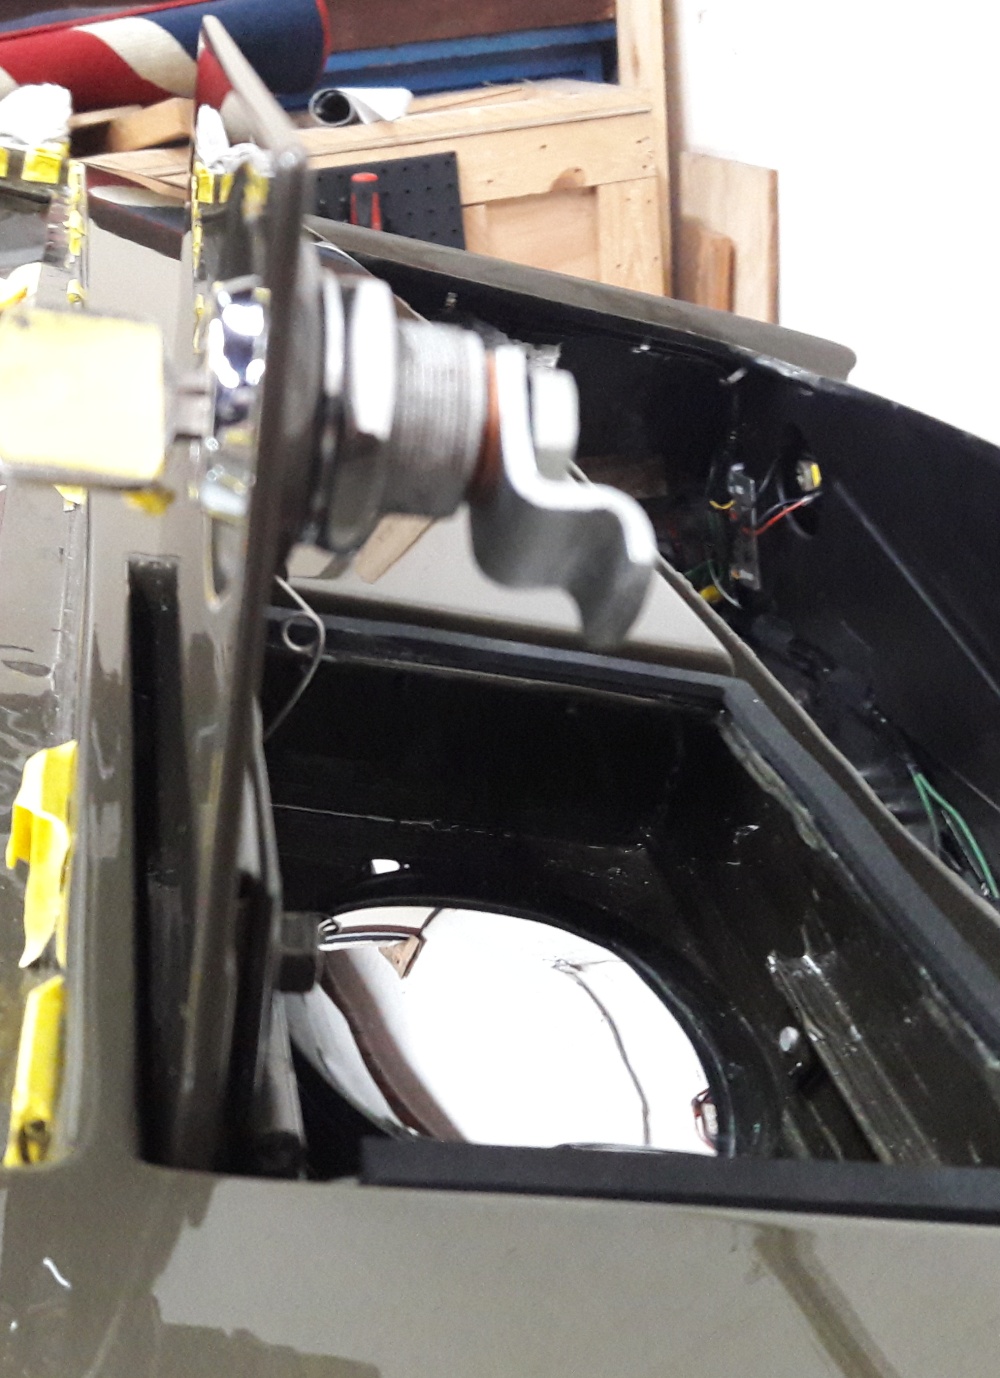
A tedious affair, these windscreen clips! They're stainless steel, and sharp as razors. Must be riveted in before the windscreens , front and rear, go in. First order of business is to tape, tape, tape. I covered the windscreen area, as there will be some filing and drilling involved, and as the instruments are in, it wouldn't do to have them covered in metal shavings. I had to hand ream every single hole and fit each rivet by hand. 36 of them in front... You're going through the aluminum skin into steel, and some of the rivets were loose after popping with the hydraulic gun, so they have to be drilled and a larger diameter rivet used, which means that the SS clips have to be hand reamed with that small round file to fit the larger OD rivet. Such fun! The trick is not to scratch paint while performing all of these operations. A very time consuming task...
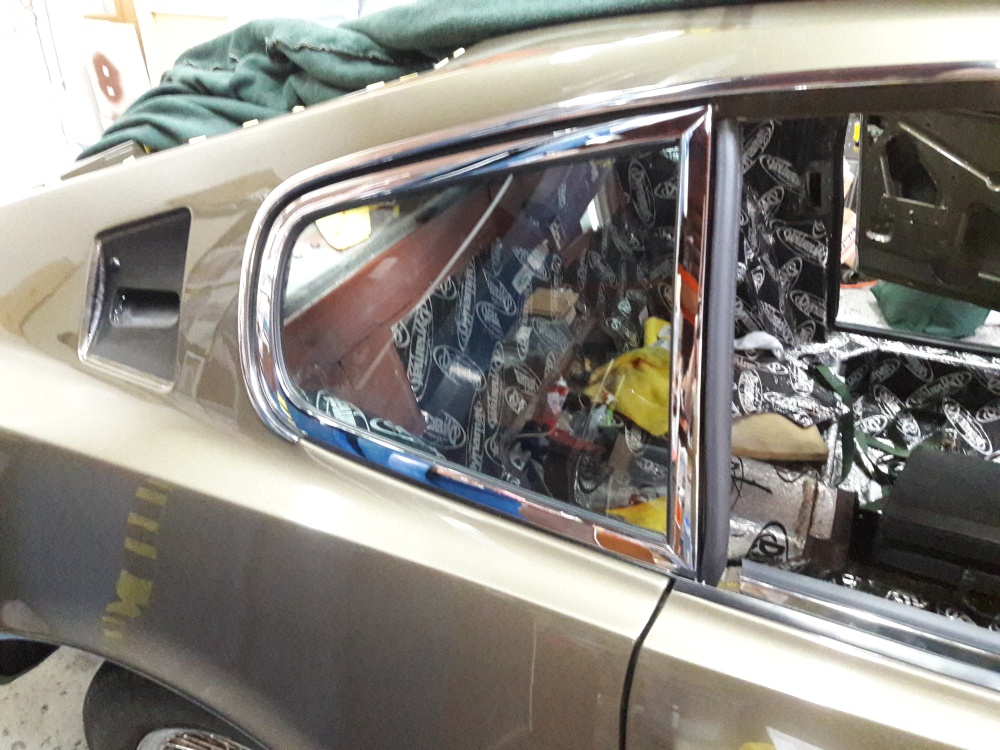
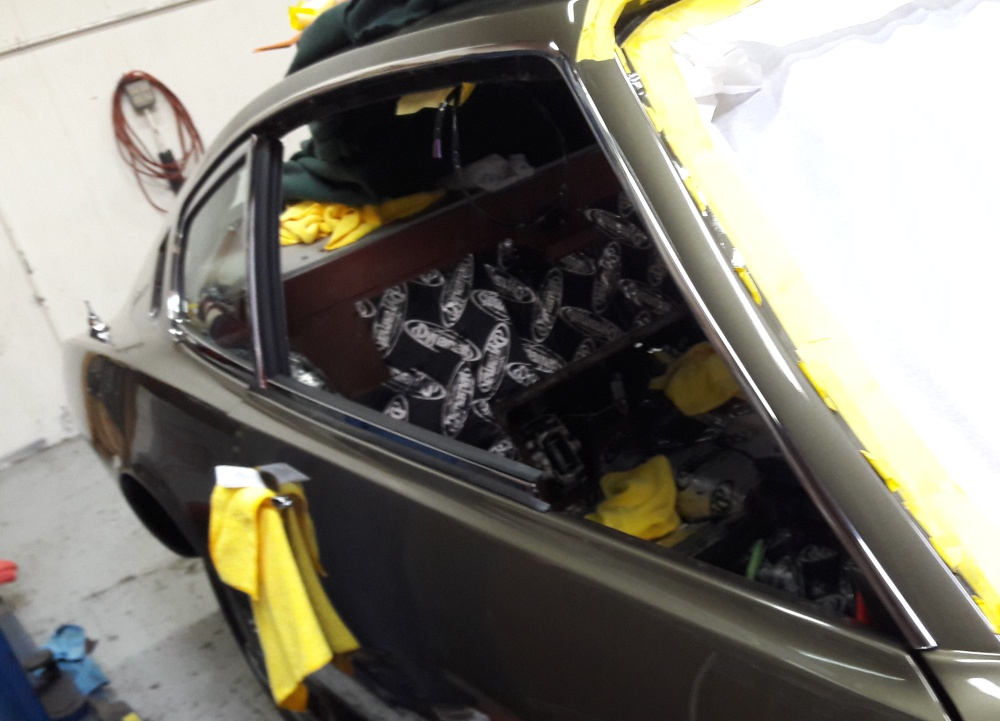
Do you see this SS rain gutter that goes all the way from the base of the front windscreen A-Pillar, then all the way along the roofline, then around the rear quarter glass? All one piece of thin stainless, guaranteed to cut your finger, scratch paint, and then need a re-polish! Many hours were spent on these, as my originals were far gone, so we bought some from a dead DBS in Australia, and,naturally, none of the holes matched, as they are indeed hand made cars. My metal guru had to weld up most of the holes, bring a shrinker/stretcher machine, and fit the trims on the car before paint, and then again after! Must have been on and off over 15 times per side, with 4 trips back to the polishers. Glad that is over....Quarter glass is now in and next is the door glass.
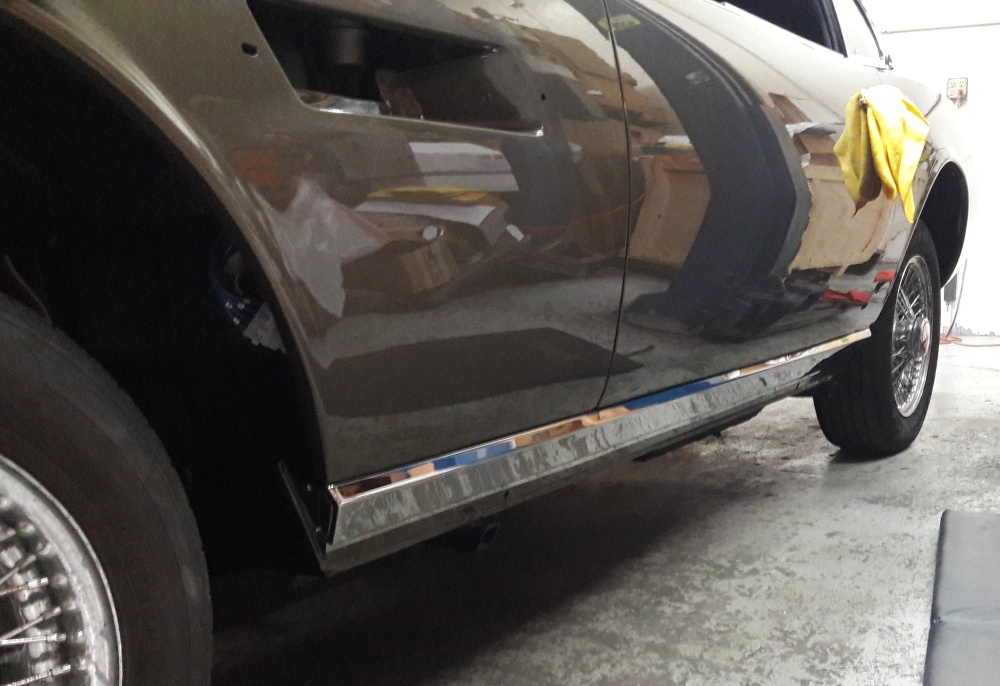
Now here's another gem, the SS sill covers. Just loads of fun to lay on my side and fit these lovelies- all mind you, without scratching paint or those delicate stainless trim pieces. Tape, tape, tape, and got there in the end. Another operation where every screw fits differently. One item that I use extensively is cutting wax on the sheet metal screw threads, which keeps them from galling. A SS screw going thru aluminum, then into steel is a very difficult thing to fit. They are slotted, so you really have to take care of your screwdriver. One slip, and it's back to the polisher.
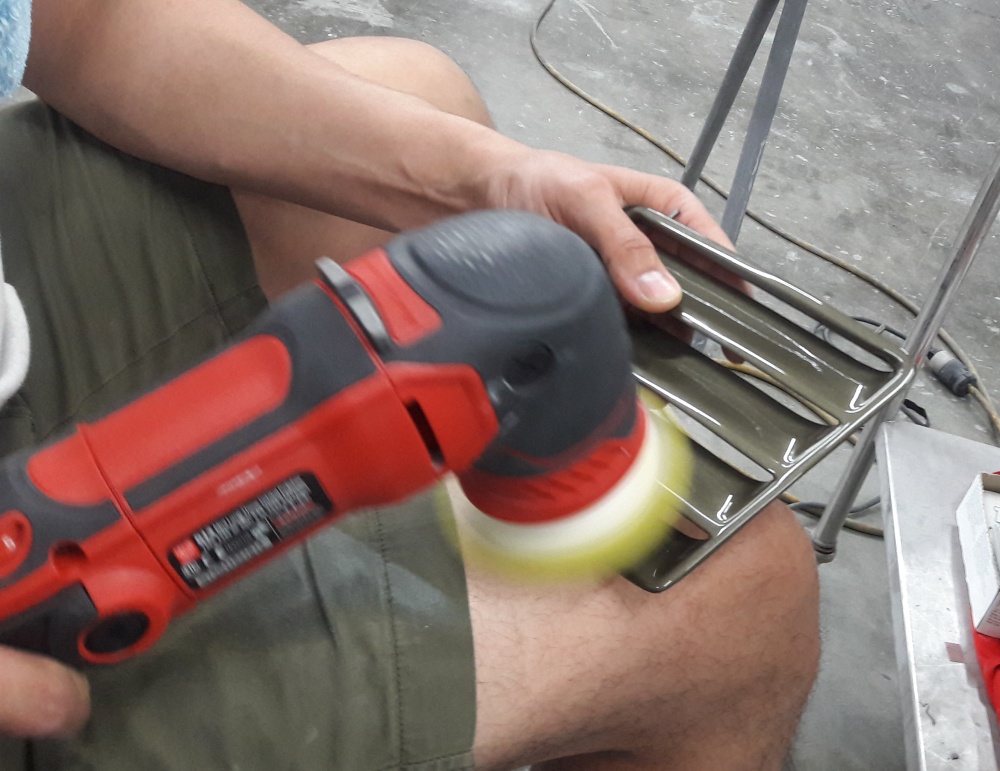
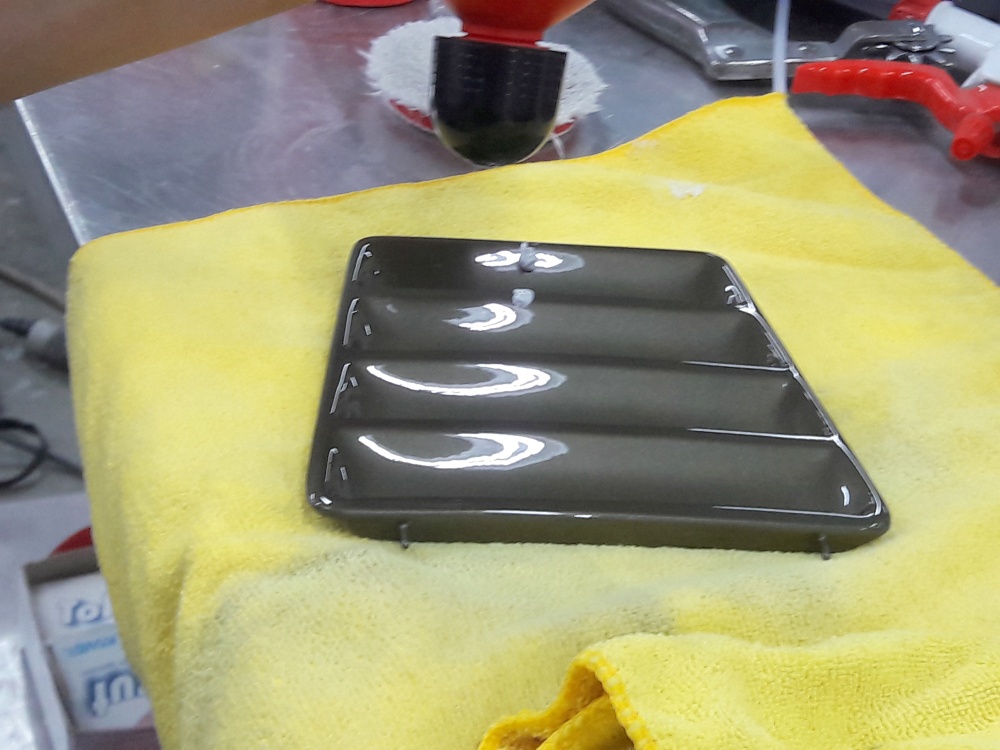
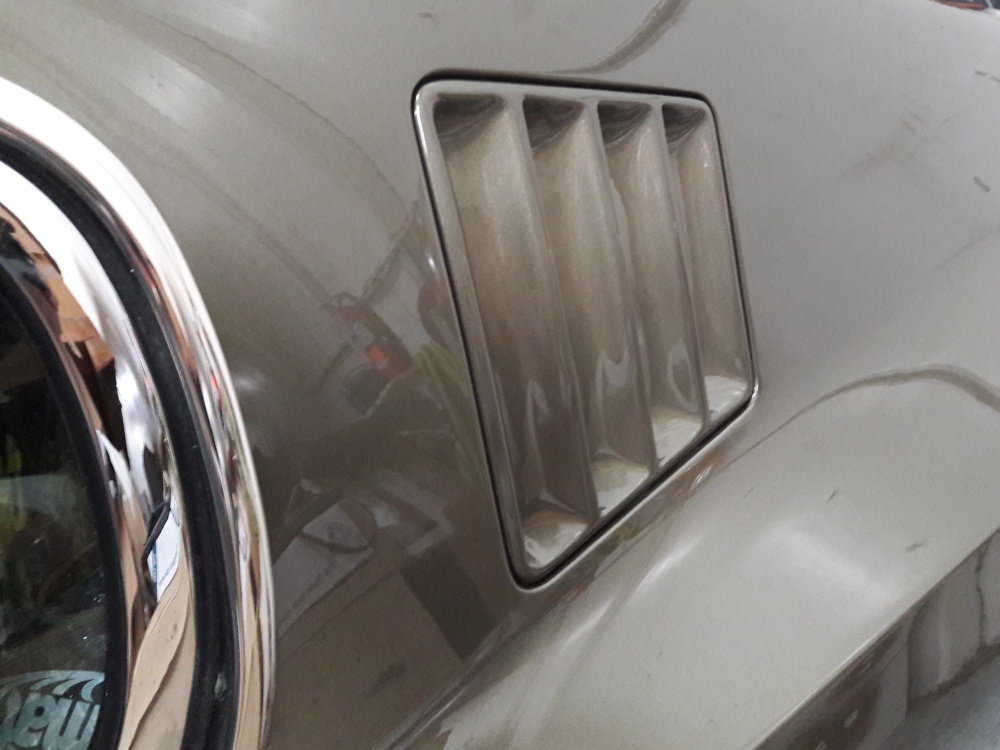
These are the side gills that are actually air extractors from the cockpit. Stamped steel from the factory, so they generally had a less than perfect fit. My metal guru and I spent a great deal of time fitting them, and during the blocking process they were bedded in. Very happy with the consistent round the whole unit,especially the corners. Look on other DBS cars and you'll generally see paint wear at the corners. They are held on with 2 pins in front and a SS windscreen clip at the rear. Tend to move around at high speeds, with all the aerodynamics working on them, so I devised a positive centering system of a ball and socket cast out of resin, then panel bonded to the body and side gill. Makes fitting them a snap.
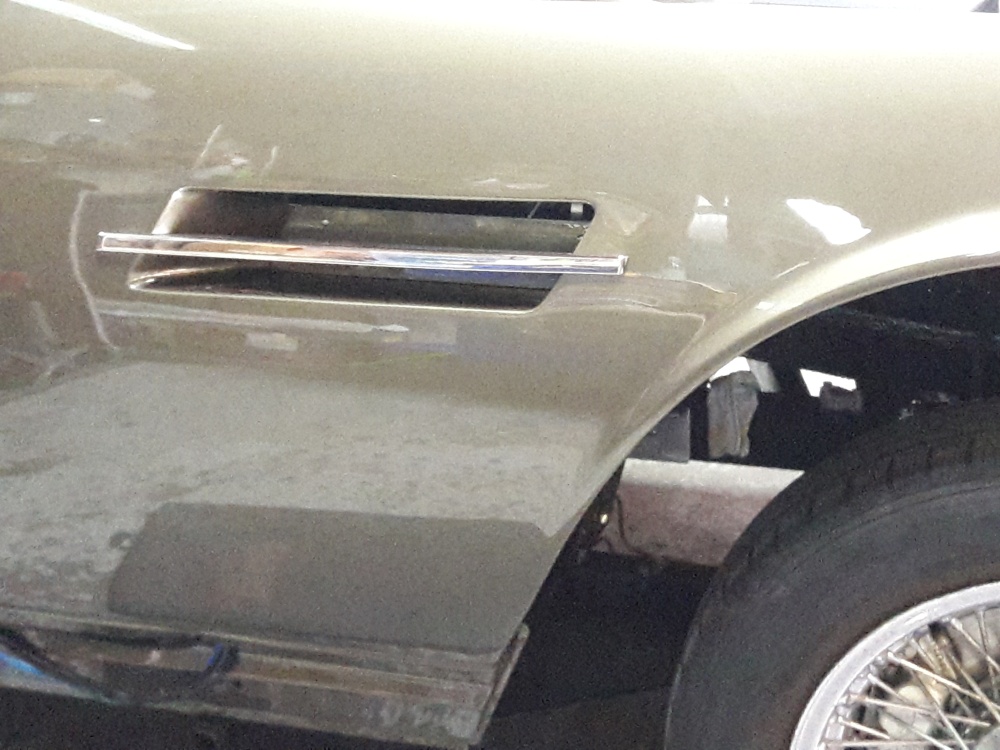
The SS side strakes go on over a painted panel, which is screwed into the body with sheet metal screws. Steel screws going into aluminum is a recipe for corrosion disaster,so I used threaded inserts and round head machine screws for a more positive locking on the panels. The SS side strakes did not have the Vantage emblems on them in the film seen cars. Here's why: GKX8G, chassis # DBS/5234/R began life as a standard DBS, with the 5 speed gearbox and SU carburettor (3) engine. FBH207G, chassis # DBS/5109/R had the SVB special Vantage experimental engine, with a DB4GT inlet cam, and Weber DCOE carburettors (3). The first car that was purchased for production was 5234, with the GKX8G registration, even though it was a later chassis #. The Aston Martin Heritage Trust fortunately has all of the build sheets and service records for both cars, and before production, the engines were swapped, giving #5234 the special engine from 5109. The Vantage emblems were deleted on 5109, and those side strakes were replaced as the originals had holes in them. I had to replace mine, as they originally had the same holes, and would show, so #5178 donated her trim pieces to my cause. She is no longer alive, as many DBS cars went to the grave. Only 789 were ever built in 6 cylinder form from 1967-72. Only 300 or so were Series 1, with the Sharknose.
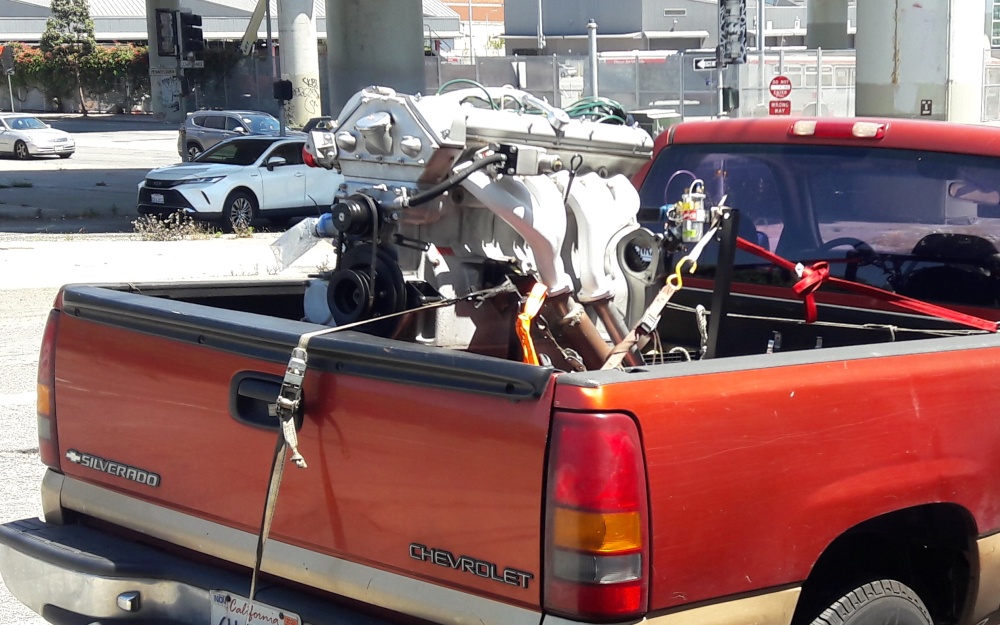
Next: The engine shall be run on a dynomometer for proper break in. The factory insists upon breaking the engine in under load, so I trucked it over across the bay to Berkeley, California to Hasselgren Engineering, ad famous tuning shop. Next week I expect to have a run, and we shall see how the engine pulls.
Stay tuned!
All the best,
Tom
Comments
It’s looking superb, and sounds like a nightmare! 😄 Fantastic work.
I was looking at the movie DBSs recently but it’s hard to find info. Does DBS/5234/R still exist? Sorry, I wasn’t sure which car you were saying is no longer alive.
You continue to amaze us, Tom. The difficulties you keep coming up against and resolving with real renewed determination and patience! Is inspiring. I think that SS surround would have pushed me to my limits!!😄
That paintwork just looks soooo good.
I'm sure there are more trials and tribulations to come, but hopefully, you're getting through the worst now. Nothing like a deadline of course, but don't kill yourself to get it done by November.
Tom, can you please replicate a pair of side grills for me, in 1/18 scale?
😄 Yes, please do Tom!
Thank you all for the comments.
Firstly, there are 2 film seen DBS cars, and both are alive. DBS/5234/R is in Australia and owned by a nice gent, Sigi, whom I correspond with, and is an AMOC (Aston Martin Owners' Club) member. Oddly enough, one of the cars was purchased from a Lazenby garage in period! I looked them up, and they were real....
DBS/5109/R was at the Dezer Museum in Florida after spending time at Cars of the Stars museum in the Cotswolds. I have photos of that car from Longstratton Motors in England, where she had some work done prior to being transported to Florida.
Sweetie and I with 5109 in Florida 2014. She needed a great deal of work. The DBS did too...
The figure standing looks like Lurch! Original Vitaloni mirrors are gone, as is the original steering wheel. Loads of filler under a poor paint job. Not apparent in the photos, but in person she is rough and needs someone to love and restore her.
Now, on the 1/18th side gills. I have no time now to begin any projects, so if someone can do that, it would be great. The gills can be scanned- actually you need only 1 as they are stamped symmetrically and there really is no left or right, as in most parts on hand made cars.
PM me if interested in taking on the project. I would love to build a proper 1/18 scale of the OHMSS car, but that is after I finish the life sized one!
Cheers,
Tom
Thank you, that’s very interesting. Good to know that the Cars of the Stars car was the real thing (they often were: Peter Nelson assembled an incredible collection).
Thank you- the DB5 that was there looked to be one of the 4 replicas made in period by Aston. The controls differed greatly from the GF 4 speed car, and the interior was well worn. The paint was nice, but did not match the patina of the interior. That's the trouble with classic cars- a nice paint job, and suddenly your chrome, brightwork, glass, and interior look bad. You just have to keep going, spending, and working at them. Rather like painting the Golden Gate Bridge. You start at one end, and by the time you're at the end, it's time to start again!
I composed a lengthy post on the engine dyno run, but somehow it needs to go through some sort of approval. Hope there aren't any SJWs on that approval team.
Cheers, Tom